Getting Started 🚀
Private Server 🔒
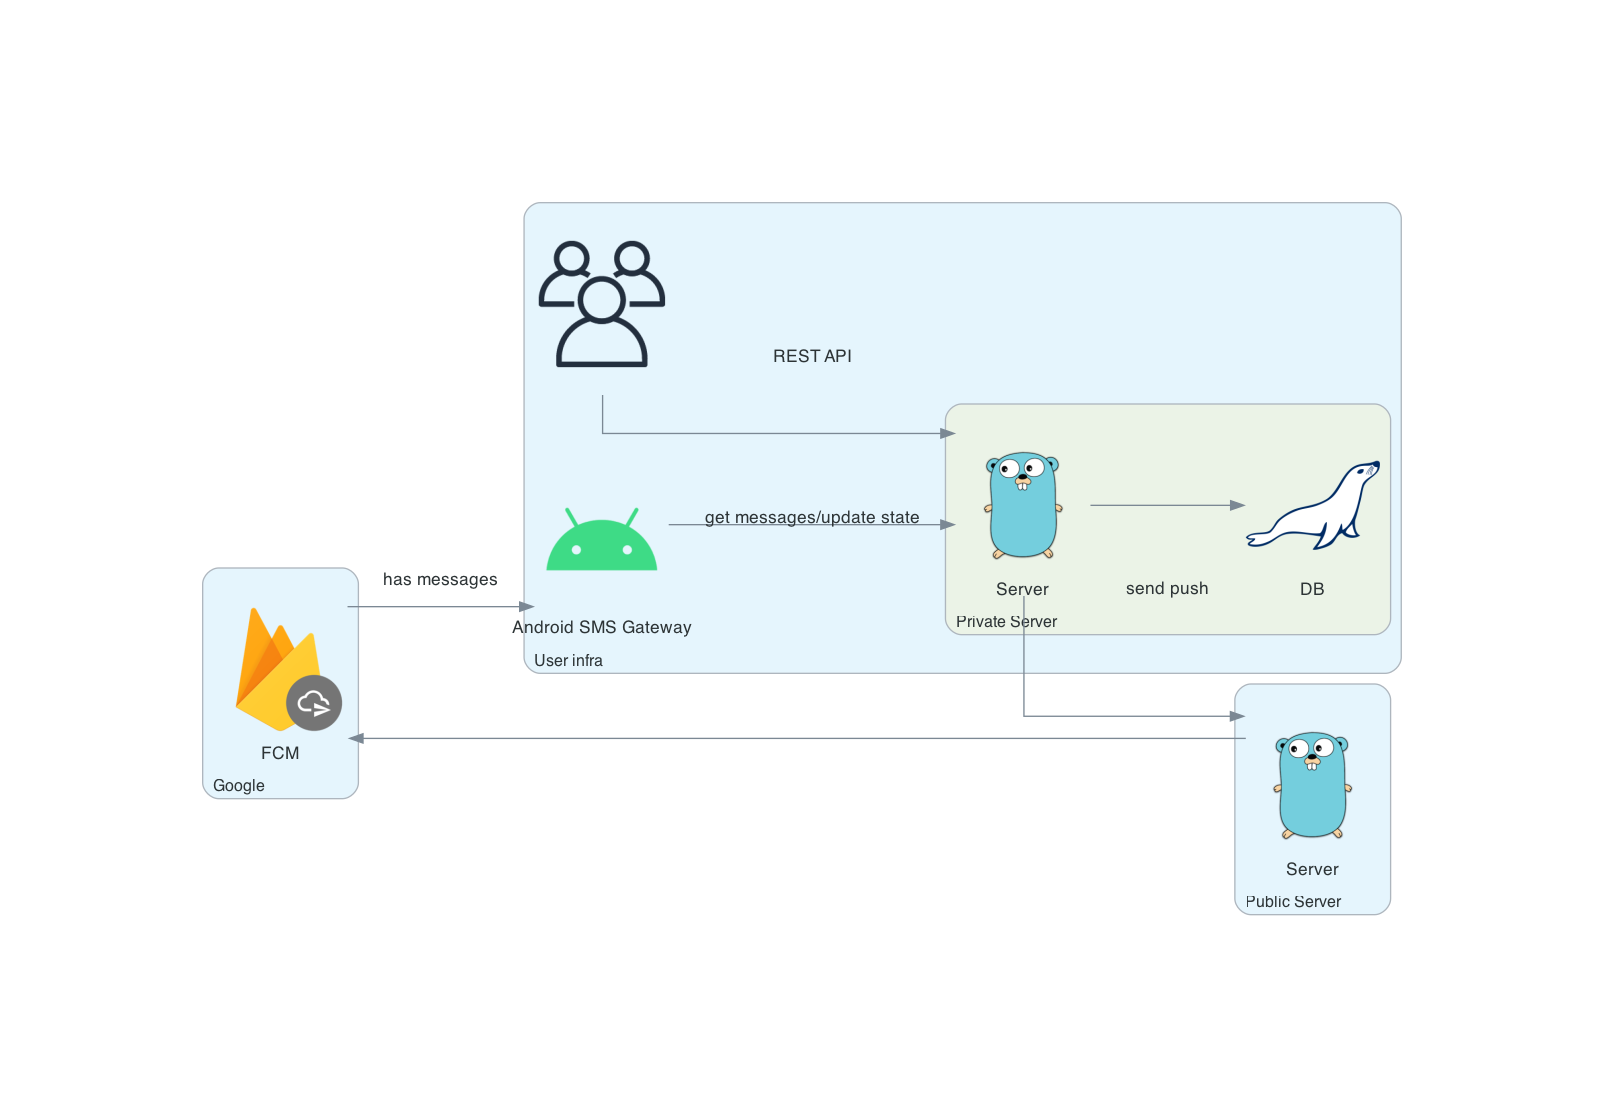
To enhance privacy and control, you can host your own private server. This keeps all message data within your infrastructure while maintaining push notification capabilities through our public server at api.sms-gate.app. This setup eliminates the need to configure Firebase Cloud Messaging (FCM) or rebuild the Android app, but it does demand some technical know-how.
When to Choose Private Mode
- 🏢 Enterprise deployments requiring full data control
- 🔐 Enhanced security compliance needs
- 📈 Messaging rate exceeds Public Server limit
- 🌐 Custom integration requirements
Prerequisites ✅
To run the server, you'll need:
- 🗄️ MySQL/MariaDB server with empty database and privileged user
- 🐧 Linux VPS
- 🔄 Reverse proxy with valid SSL certificate (project CA supported)
Additional Requirements by Method
- Docker installed
- Git and Go 1.23+ toolchain
Run the Server 🖥️
-
Create configuration
Copy the example config and customize:Get config.yml templateKey sections to edit:wget https://raw.githubusercontent.com/android-sms-gateway/server/master/configs/config.example.yml -O config.ymlgateway: mode: private private_token: your-secure-token-here # (1)! http: listen: 0.0.0.0:3000 database: # (2)! host: localhost port: 3306 user: root password: root database: sms timezone: UTC- Must match device configuration
- Must match MySQL/MariaDB configuration
Configuration Location
By default, the application looks for
config.ymlin the current working directory. Alternatively, you can set theCONFIG_PATHenvironment variable to specify a custom path to the configuration file. -
Launch the server
-
Build the binary
-
Run database migrations
-
Launch the server
- Install Helm
- Add the chart repository
-
Create values.yaml file
-
Install the chart
Security Warning
Never commit secrets to version control! Replace placeholder values with actual high-entropy secrets:
- Generate unique passwords/tokens using:
openssl rand -base64 32 - Use environment variables or secret management tools
- Consider sealed-secrets for Kubernetes
- Use cloud secret managers (AWS Secrets Manager, Azure Key Vault, GCP Secret Manager)
For detailed Helm chart documentation, see Helm Chart Documentation.
-
-
Configure reverse proxy
Verification
Test server accessibility:
Configure Android App 📱
Important
Changing servers will reset credentials and require device re-registration!
-
Access Settings
Navigate to Settings tab → Cloud Server -
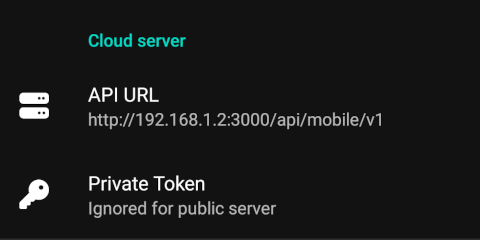
Enter server details
-
Activate connection
- Switch to Home tab
- Activate Cloud server switch
- Restart the app using the bottom button
Successful Connection
New credentials will appear in Cloud Server section when configured properly:
Password Management 🔑
Identical to Cloud Server mode.